21 Paver Patio Ideas for 2026, From Budget DIY to Backyard Luxury
A patio quietly becomes the busiest room in the house the moment the weather turns nice. It hosts morning coffee, pulls dinner outside, and somehow ends up holding half your weekend guests by the end of the night. Choose the right paver layout, and you turn a plain stretch of backyard into a space that actually earns its keep. Get it wrong, and you end up with a slab everyone avoids.

Most patio inspiration online either stays too vague to act on or drowns you in contractor jargon. This list skips both traps. You’ll find 21 paver patio ideas for 2026, ranging from simple weekend DIY layouts to full luxury entertaining zones, and each one tells you exactly what it costs, how hard it is to install, and what to watch out for before you start.
What to Consider Before Choosing a Paver Patio Idea
Before you fall for a design, walk through three questions first: how big is your yard, what can you realistically spend, and can you DIY this or does it need a pro. A tiny backyard doesn’t need a sprawling multi-zone layout crammed into it, and a high-traffic family space probably won’t hold up well with delicate natural stone underfoot.
Budget surprises trip up more homeowners than bad design choices do. Some patterns look expensive but cost exactly the same as basic pavers, just laid at a different angle. Others genuinely need a professional to last more than a season. Keep both points in mind as you scroll, and pick the idea that fits your actual yard, not just your Pinterest board.
Classic Herringbone Paver Patio

Herringbone earns its staying power because the interlocking angles add real movement to a surface that would otherwise sit flat and static. Every paver locks into the next at a sharp diagonal, and that visual rhythm makes even standard rectangular pavers look like a custom, hand-laid design. It’s one of those patterns people assume costs a fortune, when really the labor is the only thing driving the price up.
You can absolutely DIY this one if you’re willing to take your time with the angled edge cuts, and it lands comfortably in the mid-range budget tier once you factor in material and your own labor. Brick or concrete pavers in warm, neutral tones bring out the pattern best, since the color contrast between rows makes the herringbone lines pop instead of blending together.
Design Highlights:
- Use brick-toned pavers for a classic, traditional look
- Tight joints filled with polymeric sand keep weeds out
- Pairs beautifully with a simple wrought-iron furniture set
- Budget swap: use concrete pavers instead of clay brick
Large-Format Gray Concrete Slabs

Oversized pavers measuring 24 inches or larger completely change how a patio reads from across the yard. Fewer joint lines mean less visual clutter, so the surface stops looking like a pieced-together patchwork and starts reading as one clean, continuous plane. That’s exactly the effect that gives this style its modern, architectural edge, and it’s why designers keep reaching for it in 2026 builds.
Because each slab is heavy and needs precise, even leveling, this project really does call for a professional installer rather than a weekend DIY attempt. Expect to land in the mid-range to luxury budget tier once labor is factored in, but the payoff is a patio that instantly looks like it belongs to a custom-built home rather than a quick backyard fix.
Design Highlights:
- Choose cool gray tones for a modern, versatile base
- Pair with minimal furniture to let the slabs stand out
- Add a single large planter for contrast without clutter
- Works beautifully alongside floor-to-ceiling glass doors
Budget-Friendly Running Bond Layout

If your budget is tight, running bonds deserves your attention first. Installers lay each paver in simple offset rows, the same way you’d see brick stacked on a wall, and that repetition makes it one of the easiest patterns for a first-time DIYer to actually finish in a single weekend without losing momentum halfway through.
There’s a real reason this pattern shows up in nearly every budget renovation guide you’ll find. It wastes noticeably less material than diagonal layouts like herringbone, and the straight, uninterrupted lines mean you’ll spend far less time fighting with tricky angle cuts around the patio’s edges, which keeps both your timeline and your material costs under control.
Design Highlights:
- Use uniform rectangular pavers to keep costs low
- Lay in a single color for the cleanest budget look
- Add a gravel border to skip expensive edge cutting
- Great starter project for first-time DIY patio builders
Circular Fire Pit Paver Patio

A circular fire pit patio naturally pulls people together in a way rectangular layouts rarely manage. The round shape softens what would otherwise be a hard, structured stone base, and it creates an obvious, defined zone that works equally well for a big weekend gathering or a quiet Tuesday night by yourself with a blanket and a book.
This idea scales nicely to almost any yard size, since the fire pit itself sets the proportions for everything around it. Just budget carefully for the base directly around the pit, since it typically needs heat-resistant, professional-grade materials that go beyond standard patio pavers, so factor a pro into at least that portion of the project even if you DIY the rest.
Design Highlights:
- Use cobblestone-style pavers for texture around the pit
- Add a built-in stone bench for extra seating
- Choose heat-resistant materials directly around the fire pit
- Layer in string lights for evening ambiance
Multi-Zone Paver Patio for Entertaining

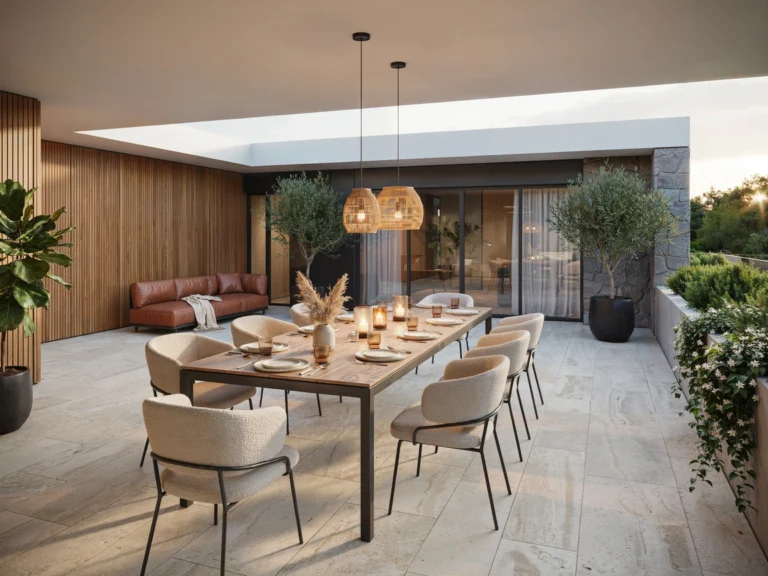
Larger backyards finally get to breathe with a multi-zone patio, since it breaks one big open slab into clearly defined areas for dining, lounging, and cooking without adding a single physical wall. Variegated stone pavers and small, subtle level changes do all the heavy lifting here, guiding people naturally from one activity zone into the next.
This is a bigger, more involved project, and it genuinely benefits from professional grading and material planning rather than a DIY attempt. Expect a luxury-tier investment once you add up the additional prep work, but the result functions like a true outdoor living space rather than just a patio someone happened to pave.
Design Highlights:
- Use a slight level change to separate each zone
- Choose one paver material throughout for cohesion
- Add distinct furniture groupings per zone, not one big set
- Include a shaded pergola over the dining area
Permeable Paver Patio for Drainage

Permeable pavers solve a problem a lot of homeowners don’t realize they have until the first heavy rainstorm floods their yard. Installers lay them with small gaps between each piece, which lets rainwater filter straight down into the ground instead of pooling on the surface or rushing off toward your foundation, and many cities actually offer incentives for choosing this option.
Because the drainage layers underneath matter so much to how well this system performs, it’s genuinely worth hiring a pro rather than guessing at the base yourself. It sits comfortably in the mid-range budget tier, and the investment pays you back over time through fewer puddling problems, less erosion, and a yard that handles storms far better than a solid paved surface ever could.
Design Highlights:
- Fill joints with gravel or sand instead of solid mortar
- Choose light-colored pavers to reduce surface heat
- Slope the base slightly away from the house foundation
- Check for local drainage incentive programs before installing
Flagstone Natural Stone Patio

Flagstone brings a genuinely organic, one-of-a-kind texture that manufactured pavers simply cannot replicate no matter how good the imitation gets. Every single piece carries its own shape, color variation, and edge, so the finished patio ends up looking like it was collected and pieced together over years rather than installed in a single project timeline.
This choice sits firmly in the luxury tier, and those irregular shapes make professional installation nearly essential if you want a level, genuinely safe walking surface. It’s a bigger upfront investment than most options on this list, but flagstone rewards you with a patio that feels timeless rather than trend-driven, which matters a lot if you don’t want to redo it again in a decade.
Design Highlights:
- Leave wide joints and fill with creeping thyme or moss
- Choose earthy tones that echo your home’s exterior stone
- Pair with wrought-iron or rattan furniture for texture contrast
- Budget swap: use flagstone as a border, not the full field
Two-Tone Border Paver Design

A single row of darker pavers running around the edge of a lighter field does more design work than you’d expect from such a small change. It creates a subtle visual frame that defines exactly where the patio ends, no wall or railing required, and it instantly makes even a basic layout read as polished and deliberately planned.
This idea stays firmly DIY-friendly and lands in the budget to mid-range tier, since you’re really only adding a second paver color rather than switching to a completely different, pricier material. Anyone comfortable laying a standard pattern can pull this off in a single weekend with a little extra planning around where the border row falls.
Design Highlights:
- Keep the border one shade darker, not a clashing color
- Use the same paver size for border and field pieces
- Works well transitioning into mulch beds or gravel paths
- A great low-cost way to elevate a plain layout
Paver Patio with Pea Gravel Accents

Mixing pavers with wide bands of pea gravel stretches a tight budget further than almost any other trick on this list. You cover noticeably less ground with actual pavers while the gravel fills every gap in between, adding real texture and softening what would otherwise be one flat, uninterrupted hardscaped surface.
This project stays firmly in the budget tier and works especially well as a DIY weekend job for casual, low-maintenance backyard spaces that don’t need a fully paved surface underfoot. Homeowners who want a relaxed, garden-adjacent feel over a formal, fully hardscaped look tend to gravitate toward this combination first.\
Gravel does a lot of heavy lifting on a tight budget — our budget patio ideas roundup has more low-cost tricks like this one.
Design Highlights:
- Alternate paver rows with 6-8 inch gravel bands
- Use edge restraints to keep gravel from spreading
- Choose warm-toned gravel to soften the overall look
- Ideal for pathways connecting to a larger seating area
Small Backyard Paver Patio Layout

Small yards genuinely perform better with one consistent paver size and a simple, restrained pattern rather than anything busy or intricate. Too much visual complexity packed into a tight footprint tends to make the space feel more chaotic and smaller, not bigger, so simplicity actually becomes your best design strategy here.
This project sits in the budget to mid-range tier and stays firmly DIY-friendly for most homeowners willing to tackle a straightforward layout. Keeping the furniture minimal and properly scaled to the space does just as much visual work as the paver choice itself, helping the whole area feel intentional instead of cramped or overcrowded.
Design Highlights:
- Stick to one paver size and color throughout
- Choose compact, space-saving furniture like a bistro set
- Add vertical greenery instead of wide planters
- Light-colored pavers help a small space feel more open
Curved Organic Paver Path Patio

Soft, sweeping curves break up the boxy, rectangular feel that most backyards default to without anyone really planning it that way. Instead of forcing straight lines to dictate exactly how people move through the space, a curved paver path slows the walk down and makes even a short stretch of yard feel genuinely considered and designed.
Cutting individual pavers to smoothly follow a curve takes real precision, so this mid-range idea works best in the hands of a professional installer, especially where the curve connects into a larger seating area. Attempting sharp, hand-cut curves as a beginner DIYer often leads to uneven gaps that show up clearly once the joints are filled.
Design Highlights:
- Use dark mulch or stone borders to sharpen the curve
- Keep the curve gentle, sharp bends look unnatural
- Pair with low, mounding plants along the path edge
- Works well connecting a driveway to a back patio
Paver Patio with Built-In Seating Wall

A low stone seating wall built directly into the patio’s edge adds real, usable seating without cluttering the space with extra furniture pieces. It quietly doubles as a boundary too, marking exactly where the patio ends and the open yard begins, all without needing a fence or railing to do that job.
This luxury-tier project genuinely needs a professional, since the wall requires a proper footing to stay level, stable, and safe for years of actual sitting. It’s a bigger splurge than most ideas on this list, but for a backyard that hosts often, the extra seating and defined structure earn their cost back quickly in everyday use.
Design Highlights:
- Match the seating wall stone to the paver material
- Top the wall with a smooth cap for comfortable sitting
- Add outdoor cushions for extra comfort during gatherings
- Works beautifully framing a fire pit or dining zone
Stamped Concrete Look-Alike Patio

Stamped concrete does a genuinely convincing job of mimicking expensive natural stone or brick at a fraction of the actual cost. Advanced stamping techniques press realistic texture directly into the surface, and integral coloring runs through the concrete itself rather than sitting on top, so from a few feet away most people honestly can’t tell it apart from real stone.
This budget to mid-range option still needs a professional for the stamping and coloring process to look convincing rather than obviously fake. It costs noticeably less than natural flagstone or brick while still delivering a patio surface that photographs beautifully and holds up well against everyday wear and foot traffic.
Design Highlights:
- Choose a stone-pattern stamp for the most realistic look
- Add integral color instead of just a surface stain
- Reseal every 2-3 years to keep the color from fading
- A smart swap when the flagstone look is out of budget
Paver Patio Under a Pergola

Adding a pergola over a paver patio instantly transforms an open slab into a genuinely defined outdoor “room” instead of just a paved area sitting exposed in the yard. The overhead structure provides real shade during summer afternoons, frames the whole space visually from every angle, and gives climbing plants somewhere natural to grow if you want to soften the hardscaping with greenery.
This mid-range to luxury idea works best with a professional, mainly because the pergola posts need a secure footing that ties properly into the paver base itself rather than sitting loosely on top. Skipping that structural step often leads to a wobbly, unstable pergola within just a year or two.Pergolas open up a lot of styling options overhead — see our dreamy outdoor gazebo ideasfor a similar shaded-structure approach.
Design Highlights:
- Match pergola wood tone to nearby outdoor furniture
- Add string lights along the beams for evening ambiance
- Train climbing vines up the posts for natural shade
- Choose a wider paver pattern to fill the framed space
Herringbone-to-Gravel Transition Walkway

Letting a herringbone paver section gradually fade into loose gravel or scattered stepping stones creates a genuinely natural bridge between the patio and the wider garden. It’s a small detail, but it makes the whole backyard read as one connected, thoughtfully planned space instead of a collection of separate, disjointed projects tackled at different times.
This budget to mid-range idea stays fully DIY-friendly, especially if you’re already comfortable laying a herringbone section for the main patio area itself. Taper the transition gradually rather than cutting it off abruptly, since a slow shift between materials always looks more intentional than a hard, sudden line.
Design Highlights:
- Taper the paver pattern gradually into the gravel
- Use stepping stones as a bridge between the two materials
- Keep gravel color consistent with the paver tone
- Great for connecting a patio to a side-yard garden
Geometric Hexagon Paver Layout

Hexagon-shaped pavers deliver a genuinely modern, high-end look without carrying much of a cost premium over standard rectangular options. The six-sided shape locks together into a honeycomb-style pattern that reads as far more custom and expensive than it actually costs to source and install, which makes it one of the better value picks on this entire list.
This mid-range idea does call for a professional, since fitting hexagon pavers cleanly along a patio’s straight edges requires far more precise cutting than simpler, rectangular patterns need. Attempting those angled cuts without experience often leaves visible gaps or uneven edges around the border.
Design Highlights:
- Choose a single neutral tone to keep the pattern modern
- Pair with minimal, low-profile outdoor furniture
- Add uplighting along the edges to highlight the shape
- A strong choice for contemporary or minimalist homes
Rustic Cobblestone Patio

Small cobblestone pavers bring an old-world, cottage-style charm that larger, uniform pavers simply cannot match no matter how they’re arranged. The tiny scale of each individual stone creates genuine texture and visual interest, and that detail holds up even in a fairly compact patio footprint where bigger pavers might feel plain by comparison.
This mid-range idea can work as a DIY project if you bring in some extra help, since cobblestones take considerably more time to lay one by one compared to larger paver units that cover ground faster. Budget extra weekends for this one if you’re tackling it yourself.
Design Highlights:
- Choose warm, varied stone tones for authentic character
- Leave slightly wider joints for a relaxed, aged look
- Pair with vintage-style furniture for a cohesive theme
- Works beautifully in cottage or farmhouse-style yards
Oversized Slab Pool Deck Patio

Homes with a pool benefit enormously from oversized paver slabs, since they create a seamless, uninterrupted surface stretching from the patio right up to the water’s edge. Fewer joints mean less visual noise breaking up the surface, which keeps the whole poolside area feeling clean, cohesive, and genuinely resort-like rather than choppy and segmented.
This luxury-tier project firmly needs a professional, since pool-adjacent installations require slip-resistant materials and carefully planned drainage that directs water safely away from the pool itself. Cutting corners here creates real safety risks around a wet, high-traffic area where people are walking barefoot.If a pool is part of the plan, our above ground pool deck ideas guide covers more surface and safety options worth checking.
Design Highlights:
- Choose textured, slip-resistant paver finishes near water
- Keep the color palette light to reflect heat away
- Match paver tone to the pool coping for cohesion
- Add wide joints planted with low groundcover for softness
Two-Level Paver Patio Design

Sloped yards finally get to work with their terrain instead of against it through a two-level patio design. Rather than forcing everything onto one flat, awkwardly graded plane, a retaining wall separates the space into distinct levels that each feel independent while still staying visually connected through matching paver materials throughout.
This luxury, pro-recommended idea involves considerably more structural planning than a flat patio, but it genuinely solves a real problem for homeowners dealing with uneven backyard terrain that’s been sitting unused for years. The end result finally makes a difficult yard feel intentional and fully usable.
Design Highlights:
- Use matching pavers on both levels for cohesion
- Add wide, shallow steps instead of steep stairs
- Place lighting along the retaining wall edge for safety
- Assign each level a distinct purpose, dining or lounging
Mixed-Material Paver and Wood Deck Combo

Combining a paver patio with an adjoining wood deck section adds genuine textural contrast that keeps a large outdoor area from feeling flat and monotonous. The wood brings warmth and a softer, more residential feel, while the pavers handle the durable, low-maintenance surface duties in the busier, high-traffic zones of the yard.
This mid-range to luxury idea works best with a professional who can properly transition the two materials at the seam for a clean, level, safe finish. A poorly executed transition between wood and paver often creates a tripping hazard, so precision matters more here than it might first appear.
Design Highlights:
- Keep both materials in a similar tone family
- Use the wood deck section for dining, pavers for lounging
- Add a metal transition strip at the material seam
- Great for homes with a walkout basement or raised entry
Luxury Outdoor Kitchen Paver Patio

Homeowners who genuinely love entertaining take backyard living to another level entirely with a full outdoor kitchen built directly into a large-format paver patio. Built-in grill stations, real counter space, and dedicated seating turn what used to be a simple patio into a true second kitchen that handles everything from casual weeknight dinners to full weekend parties.
This stands as the most involved, luxury-tier idea on the entire list, and it absolutely requires professional installation for plumbing, gas lines, and structural counter elements that a DIY approach simply can’t handle safely. The investment is significant, but so is how often this space actually gets used once it exists.Entertaining setups like this pair naturally with a well-planned bar area — take a look at our backyard bar ideas for more inspiration.
Design Highlights:
- Choose heat and stain-resistant pavers near the cook zone
- Add a covered section to protect the kitchen from weather
- Include bar seating for guests to gather while you cook
- Match cabinetry finishes to the paver tone for cohesion
How Long Does a Paver Patio Really Last?
With proper installation and regular sealing, a paver patio typically lasts 15 to 30 years or even longer depending on the material you choose. Concrete pavers tend to sit toward the lower end of that range, while natural stone options like flagstone often outlast them significantly when properly maintained over the decades.
The base underneath matters far more to longevity than the paver style sitting on top of it. A properly compacted gravel base combined with the correct drainage slope determines how well your patio holds up over time, more so than any single material or pattern choice you make.
Common Mistakes to Avoid
- Skipping proper gravel base compaction to save time or money
- Ignoring drainage slope, which leads to pooling near the house
- Choosing a pattern too complex for a first DIY attempt
- Forgetting to order 10-15% extra pavers for cuts and waste
- Not sealing pavers within the recommended timeframe after install
FAQ
Is a paver patio a good investment?
Yes, a well-installed paver patio typically adds real value to a home and delivers a strong return, especially when compared to less durable materials like plain poured concrete.
What is the cheapest paver pattern to install?
Running bond generally stays the most budget-friendly pattern, since it requires fewer cuts and produces far less material waste than diagonal or herringbone layouts.
Do paver patios need to be sealed?
Yes, sealing every 2 to 3 years actively protects pavers from staining, fading, and cracking, while also helping polymeric sand joints stay intact for much longer.
What’s the best paver pattern for a small patio?
A single, consistent paver size laid in a simple pattern like running bond or basketweave makes small spaces feel more open than busy, multi-directional patterns ever could.
Can you install pavers yourself, or do you need a pro?
Simple, flat layouts like running bond stay realistic DIY projects for most homeowners. Anything involving curves, fire pits, seating walls, or drainage systems genuinely needs a professional.
Conclusion
A paver patio never has to be an all-or-nothing backyard overhaul. Whether you gravitate toward a simple budget-friendly layout or dream about a full luxury outdoor kitchen, this list holds an idea that fits your space, your skill level, and your budget without leaving you overwhelmed by choices.
Start with the single idea that solves your biggest need right now, more seating, better drainage, or just a patio that finally looks finished, and build outward from there. Often, the smallest layout change ends up making the biggest difference in how your entire backyard actually feels to live in.